Building a Raspberry Pi-powered smart mirror is an engaging project that combines hardware assembly with software configuration. Here’s a step-by-step guide to help you create your own smart mirror:
Materials Needed:
- Raspberry Pi: A Raspberry Pi 3 or newer model.
- Monitor: A monitor with HDMI input; the size depends on your preference.
- Two-Way Mirror Acrylic: This allows the display to show through while reflecting like a mirror.
- Frame: A frame to house the monitor and Raspberry Pi.
- Power Supply: Appropriate power adapters for the Raspberry Pi and monitor.
- Cables: HDMI and power cables.
- Keyboard and Mouse: For initial setup.

Instructions:
- Prepare the Monitor:
- Remove the monitor’s casing to access the internal components.
- Ensure the display panel is clean and free from any obstruction
- Install the Two-Way Mirror:
- Cut the two-way mirror acrylic to fit the monitor’s dimensions.
- Attach the mirror to the front of the monitor using adhesive strips or double-sided tape.
- Assemble the Frame:
- Construct a frame that can securely hold the monitor and Raspberry Pi.
- Ensure there are openings for ventilation and cable management.
- Set Up the Raspberry Pi:
- Install the Raspberry Pi OS on a microSD card.
- Connect the Raspberry Pi to the monitor via HDMI.
- Power on the Raspberry Pi and complete the initial setup.
- Install Smart Mirror Software:
- Open a terminal on the Raspberry Pi.
- Install the MagicMirror² software by running the following commands:
cd ~ git clone https://github.com/MichMich/MagicMirror cd MagicMirror npm install - Start the MagicMirror application to test the setup:
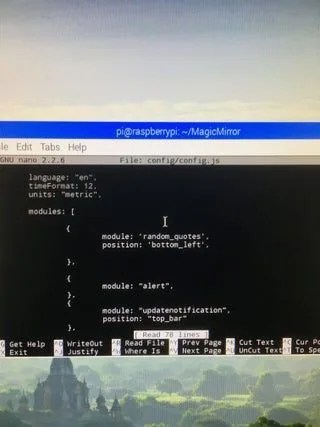
npm start - Configure the modules and settings by editing the
config/config.jsfile.
- Finalize Assembly:
- Mount the Raspberry Pi securely within the frame.
- Route and conceal all cables to maintain a clean appearance.
- Place the assembled smart mirror in your desired location.

For a detailed tutorial with images and additional tips, refer to the Raspberry Pi Foundation’s guide on building a super-slim smart mirror.
By following these steps, you’ll create a functional and stylish smart mirror that displays useful information like time, weather, and calendar events, all while maintaining the reflective surface of a traditional mirror.


